I had no reference for the scene layout other than a pre made proxy of the scene see below.
Using the proxy scene that simon layed out, I used it to give me an idea of scale so I could start to build up the scene, adding in Props and editing existing props to fit into the environment as needed.
Above shows the initial build up of the scene in the first week. Adding props, uv unwrapping them and starting work on the tent canvas, door and flag dynamics that I thought would be essential to add life to the scene. As I modelled the props and uv unwrapped them I passed them over to Emma Taylor to texture as we went along. I then took the textures back into the scene and referenced them from dropbox to make life easier and to make sure they looked right in the scene. This worked quite nicely as a little production line and we knocked out the models and the textures quickly as a result. Below is a few props which I modelled and uv unwrapped and Emma textured.
Fig 1: stove
Fig 2: teapot
Above is a quick breakdown of the campfire area, which was modelled by me and some props textured by me and by Emma. I had also started to work on the fire flames but this will be explained and demonstrated further later.

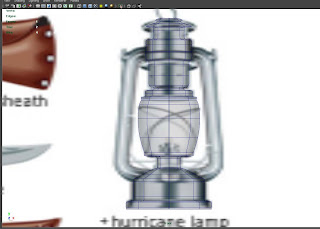
The two images to the left are some examples of reference being used for modelling some of the props using a technique of lofting which over the course of this project iv found very useful for quickly modelling symetrical objects.
For connecting different elements of the model that have been lofted I used the fillet tools, which covered the seams nicely and made the piece look like one seamless piece of geometry. I have also started making much more use of Booleans for making holes like the ones on the stove see fig 1.
I also found that I was using the converting tools more to get easier to unwrap uv's. I found a lot of the time I was converting the nurbs modelled and lofted shapes into polygons and setting the poly count at an appropriate level, to maintain the original modelled shape while allowing for easy uv unwrapping and texturing.
I found using a lot of reference from many different types and styles of the object being modelled helped me to model the props more accurately and keep to a low polycount as requested while maintaining a appropriate level of detail.
Below are some more objects, modelled, uv unwrapped and textured all by me. These are the first few examples of me dabbling in texturing other than the major characters props such as the pocketwatch and the missile which will be shown later. Again keeping to a low polycount, while maintaining a medium level of detail as these would be in many shots.
One of the last props I modelled was the sleeping bag as I needed the complete finished geometry and rig of the apprentice to place the character in the pose he would be in while inside the sleeping bag. This was important for the closed sleeping bag shot with the apprentice inside. I wanted to make the top of the sleeping bag from ncloth so it would drape over the character in a more organic way than modelling it into position. Below shows the setup before turning it into ncloth.
Once I had turned the geometry of the top part of the sleeping bag into ncloth, I used the play back and a combination of fiddling with the nucleus settings to get the cloth to lay on the apprentice nicely. I also pinned the sides of the cloth to the bottom part of the sleeping bag to make the cloth fall more naturally.Once I got the cloth to lay on him nicely I set the initial state of the cloth, deleted the history, duplicated the geometry, which then allowed me to have the geometry position of the ncloth without the dynamics.
Below is quick overview and breakdown of the rigging of the second sleeping bag for when the apprentice opens the sleeping bag.It also shows the wireframe of the sleeping bag and the texturing i did on it. For the rig I just used a simple set driven key control with plenty of joints for the flap that opens and another simple control to translate the zip. When I made the sleeping bag I was very short on time due to the massive list of other things to do, so the modelling could have been better to help make the weight painting easier and thus better deformations. Other than that it was a fairly swift process, lastly I also split the rigging elements and geometry into layers and locked them so the animator can only select the controls.
In the next blog post I will cover some of the plants I modelled and more development of the camp scene.


No comments:
Post a Comment